 |
||
|
|
Oracle Installation step by stepBefore starting the Oracle installation, some factors like installation type and method of installation should be decided:Typical: Installs a preconfigured starter database, licensable Oracle options and cartridges, networking services, Oracle utilities, and online documentation. This type of installation is recommended for users who want the complete database package. Minimal: Provides the option of installing a preconfigured starter database, networking services, and Oracle utilities. This type of installation is recommended for users who want a minimum database package. Custom: Allows you to selectively install product components from the CD-ROM (not recommended, unless you are experienced with Oracle). Interactive/Non-Interactive Oracle installation Typically, you run Oracle Universal Installer in interactive mode. However, advanced users (such as database administrators) can also run the installer in non-interactive or silent mode, using a response file. This is a text file containing variables and values used by Oracle Universal Installer during the installation process. Using the silent installation enables you to bypass the graphical user interface (GUI) and install Oracle products in silent mode. To use a response file, modify the response file template, which is located in the \\Response folder located at the root of the Oracle Enterprise Edition CD-ROM. To install the Oracle Server software in interactive mode, follow the steps in this section. Step 1 Insert the Oracle CD-ROM into the system's local CD-ROM drive. Step 2 Optionally, as the oracle user, you can check the environment settings using the env command: % env Step 3 Change directories to the Oracle installation directory on the CD-ROM: # cd /cdrom/cdrom0/orainst Step 4 Issue the orainst command:
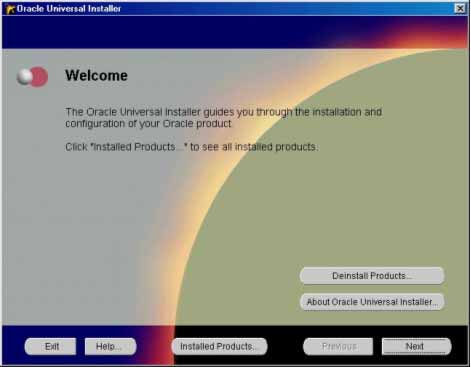 It is assumed that this is a fresh install so no other Oracle products should be installed at this time. Click on the Next button to move to the File Locations screen as shown below: 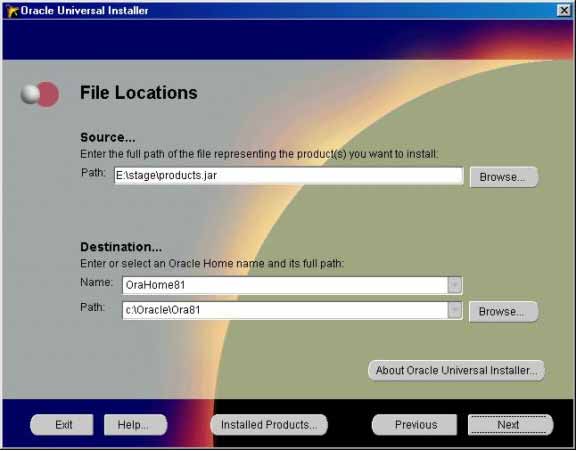 In this screen, the Source and Destination locations must be selected. The Source path should reflect either your CD-ROM or the directory in which you unzipped the source files. Leave this as the default. In the example above, the source files were unzipped into c:\\source\\Oralce\\Xi\\NT20009011\\Disk1 directory. For the Destination, leave the Oracle Home named OraHome90 as the default. Choose a hard disk drive that has at least 10 gigabytes of free space. In the example here, we are using the C: drive. Leave the \\Oracle\\OraX0 path as it is (the default). If you must change this to a different drive, only change the drive letter and not the directories. Click on the Next button to load the Product information. This may take up to 2 minutes (depending on the speed of your machine). Once the product information has been read, the following 3 "Available Products" options are presented: 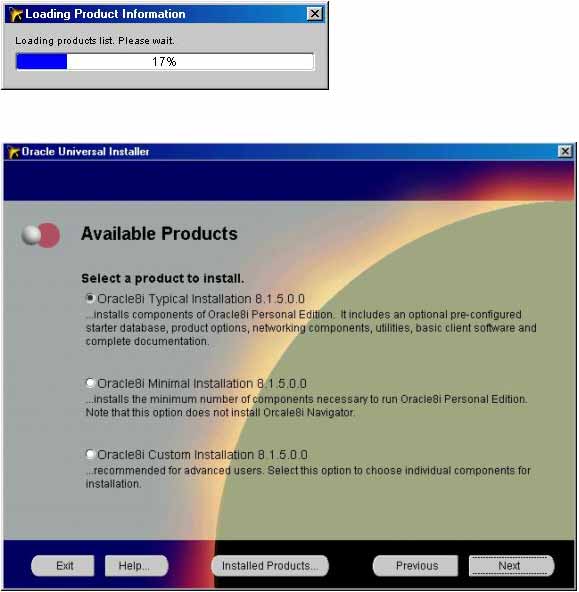 The "Installation Types" screen will appear next. For this installation, we choose the Enterprise Edition.  The next step is to identify the database using the Global database name: 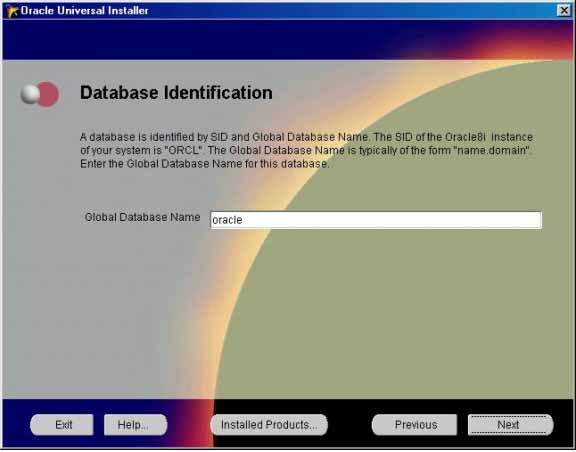 If some default Global database name and SID are given, keep them. Otherwise, use the following (make a note of these for later on: These are important terms! ): Global Database Name is orcl Click on the Next button to continue to the "Documentation Location " screen 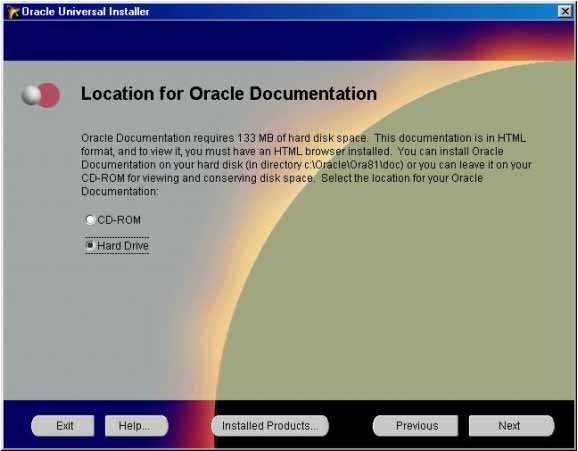 In this step, you need to select where the Oracle documentation files will be located. In large operations, we typically keep the data files on a separate disk (or disks), however, for this Oracle installation, we are storing the data files in the same C:oracle directory tree. Keep the default and click on the Next button to move to the "Summary" screen:  In this screen (shown above), the products and files that will be installed are summarized. Note that in this example, it will take 1.5 GB MB of disk space for the installation of the software. Additional space will be required for the default database. If everything looks OK at this point, click on the Install button to begin the installation. During the install, you will notice various Oracle products being copied over to the hard disk. For example, in the below figure, a portion of the Oracle Enterprise Manager is being installed. 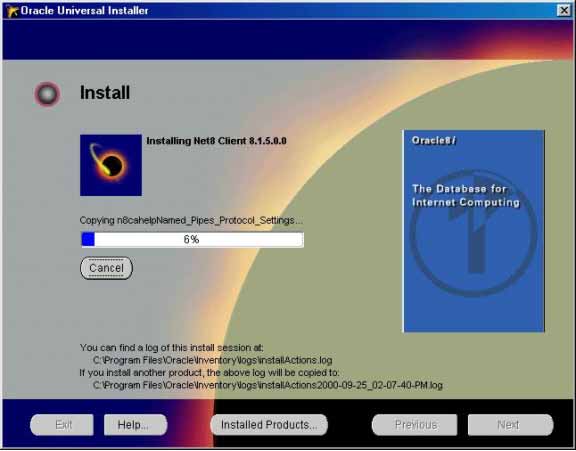 Once the default database has been installed, the following screen will appear:  Clicking on the Password Management button and change the default passwords for the SYS, SYSTEM, SCOTT and DBSNMP accounts as shown below (Make sure that you write them down: You WILL forget them!):  Click the OK button when done. This should conclude the configuration of the database and the "End of Oracle Installation" screen should appear as below. Click on the Exit button and click on the
following Yes button to confirm exiting the Oracle Installation program. 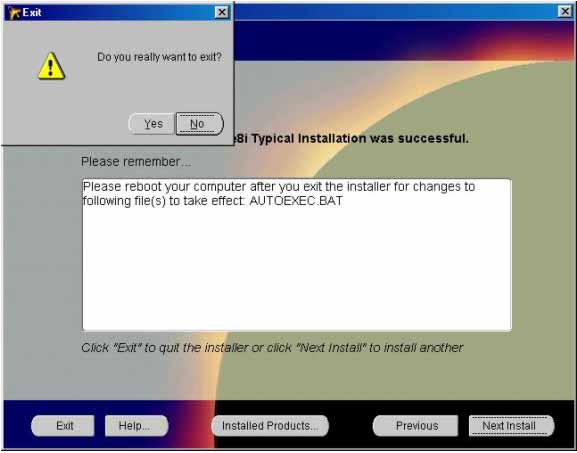 At this point, be sure to reboot your computer so any final changes can take effect. In particular, the path c:\oracle\oraX0\bin will be added to the PATH environment variable. Your Oracle installation should now be complete. Return to installing the Oracle database
|
Exclusive interviews with:
Free eBookSubscribe to my newsletter and get my ebook on Entity Relationship Modeling Principles as a free gift: What visitors say...
"I just stumbled accross your site looking for some normalization theory and I have to say it is fantastic.
Read more
Testimonials
I have been in the database field for 10+ years and I have never before come across such a useful site. Thank you for taking the time to put this site together." Mike, USA |
|
Theory & Practice DB Normalization Analysis Phase Database Keys DB Glossary Appl.Architecture Oracle DBA MySQL DBA SQL Server DBA Install Oracle Install SQL Server Proj.Management Oracle Constraint Programming Tips Database Normalization eBook: |
||
|
Copyright © www.databasedesign-resource.com /
All rights reserved. All information contained on this website is for informational purposes only. Disclaimer: www.databasedesign-resource.com does not warrant any company, product, service or any content contained herein. Return to top
The name Oracle is a trademark of Oracle Corporation. |
||